<Weeks 3,4> Preprocessing for improving the quality of the output
In the following weeks (June 27,2022 to July 10, 2022), for each test case, I will try to :
- Research algorithms for pre-processing image.
- Gather many test cases for improving pre-processing methods.
Based on the results of previous research, I realize that Tesseract does various processing internally before doing the actual OCR. However, some instances still exist where Tesseract can result in a signification reduction in accuracy.
So in this post, I would like to introduce some pre-processing methods that apply directly before passing in Tesseract.
Removing Shadow
-
The main idea is to extract and segment the text from each channel by using Background subtraction (BS) from the grayscale image, which is a common and widely used technique for generating a foreground mask.
-
BS calculates the foreground mask performing a subtraction between the current frame and a background model, containing the static part of the scene or, more in general, everything that can be considered as background given the characteristics of the observed scene.
-
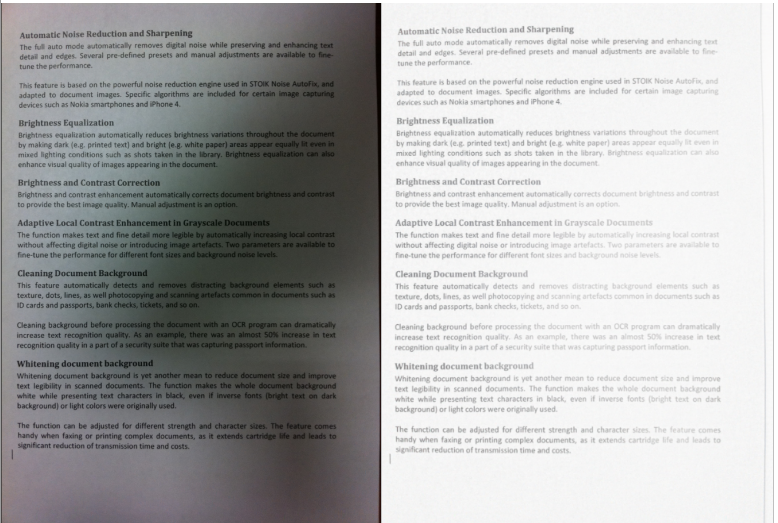
The purpose is to remove the shadow or noise from background of each test case (in each set case here the background of scanned image can be influenced by many external factors)(convert the background into white or black) and then merge each track into an image.
For simplify, here is an example, we can see the Tesseract output can be affected by the light.
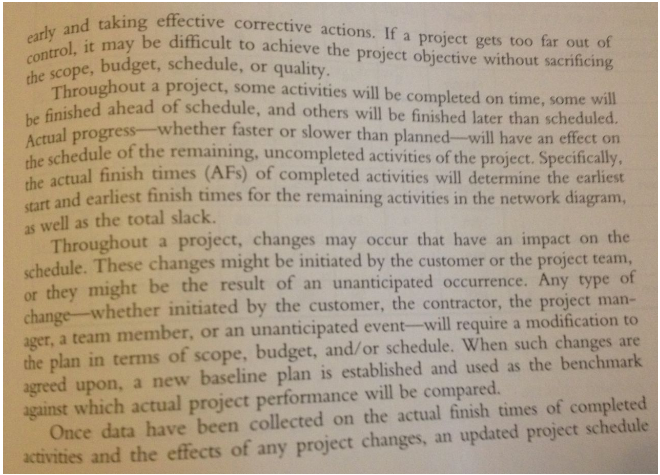
Please look at three picture channels; the amount of shadow in blue in the channel is the most distributed.

Implementation
First step
Extract the background by making blur the part of the text. Morphological operations are helpful right now.
-
Grayscale dilation of an image involves assigning to each pixel the maximum value found over the neighborhood of the structuring element by using a square kernel with odd-dimensional (kernel 3 x 3).
-
The dilated value of a pixel x is the maximum value of the image in the neighborhood defined.
Dilation is considered a type of morphological operation. Morphological operations are the set of operations that process images according to their shapes.As the kernel B is scanned over the image, we compute the maximal pixel value overlapped by B and replace the image pixel in the anchor point position with that maximal value. As you can deduce, with background with and black text, this maximizing operation causes dark regions within an image to reduce. The bigger size of the kernel is, the blurrier text is. They are transferred as noise as we need to remove.

Second step
Median Blur helps smooth image and remove noise produced from previous operations. They take each background more generally.

Third step
cv2.absdiff is a function that helps find the absolute difference between the pixels of the two image arrays. Using this, we can extract just the pixels of the text of the objects. Or on the other way, the background becomes white; the shadow is all removed.

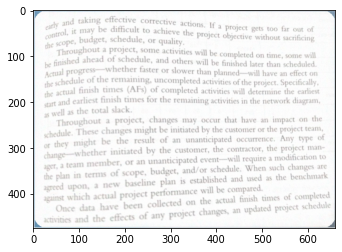
And finally, merging all channels into one image, we get the following result. We can see the noise in background is removed, we obtain of course a better output.
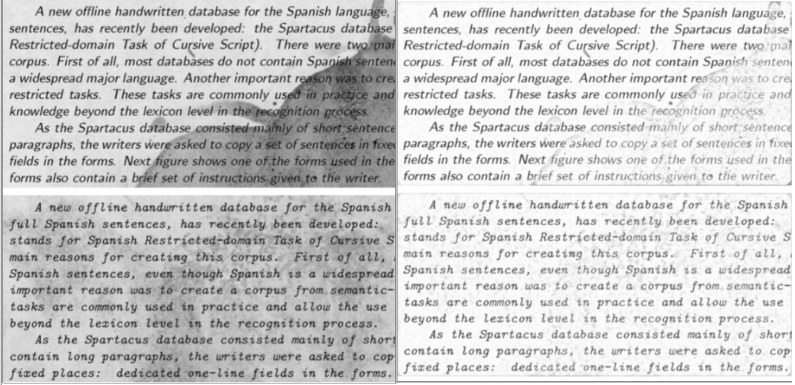
Here is more the example test cases that I have tried, and all we almost get the better results:
Perspective correction
The issue is more specific to some image acquisition devices (digital cameras or Mobile devices). As a result, the acquired area is not a rectangle but a trapezoid or a parallelogram. Once the image transformation is applied, the corrected font size will look almost similar and give a better OCR result.
I was really helpful to use these ressources to help me explain this post :
Implementation
Building the optional document scanner with OpenCV can be executed in the following steps :
- Step 1: Detect edges.
- Step 2: Use the edges in the images to find the contour (outline) representing the piece of paper being scanned.
- Step 3: Apply a perspective transform to obtain the top-down view of the document.
Take a look at an example.
First, to speed up the image processing process and improve our edge detection more accurately, we take the ratio of how big our image is compared to the height of 500 pixels, then resize the image.
Convert the image from colored to grayscale, use Gaussian blurring to remove high-frequency noise, and then apply a bilateral Filter, which is highly effective in noise removal while keeping edges sharp. Then I used one Median blur operation similar to the other averaging methods. Here, the central element of the image is replaced by the median of all the pixels in the kernel area. This operation processes the edges while removing the noise. All these methods are helpful for edge detection and improving accuracy. See the following steps of this process:
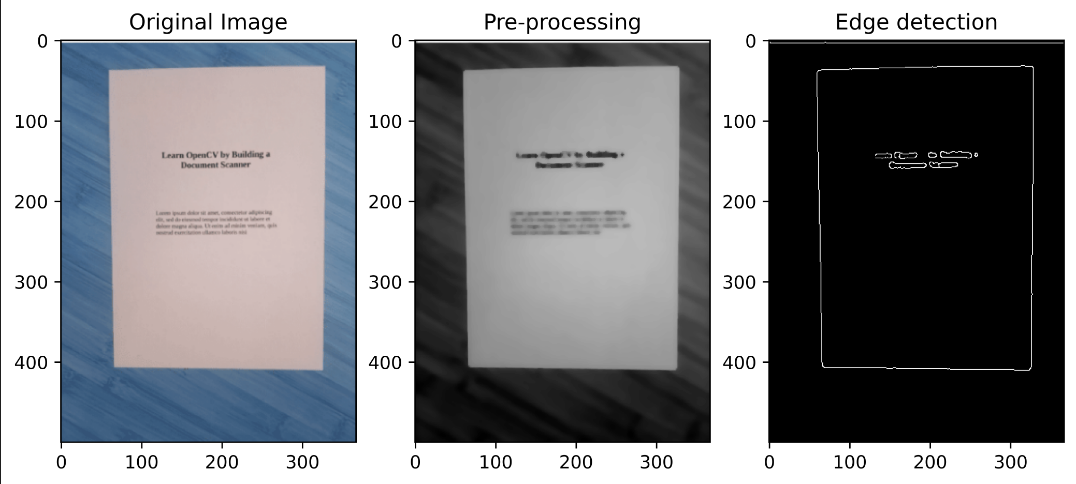
Second, we scan a piece of paper that usually will take the shape of a rectangle, so we now know that we have a rectangle with four points and four edges. Therefore, we will assume that the most prominent contour in the new image will take precisely four points in our piece of paper; another way, the most prominent edges have a higher probability of being documents we are scanning.
The algorithm to find the largest contours :
-
Use
cv.findContours()function, who finds contours in a binary image. Contours is a list of all the contours in the image under form (x,y) coordinates of boundary points of the object and then sort the contours by area and keep only the largest ones. This only allows us to examine the largest contours, discarding the rest. -
It loops over the contours and uses
cv2.approxPolyDPfunction to smooth and approximate the quadrilateral.cv2.approxPolyDPworks for cases with sharp edges in the shapes like a document boundary. -
Having four points, we save all rectangles and widths; we determine the width and height, and the top left two points of our rectangle (the largest one) or the largest rectangle should be our document.
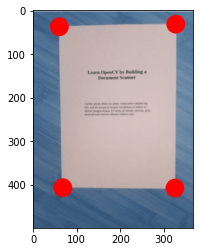
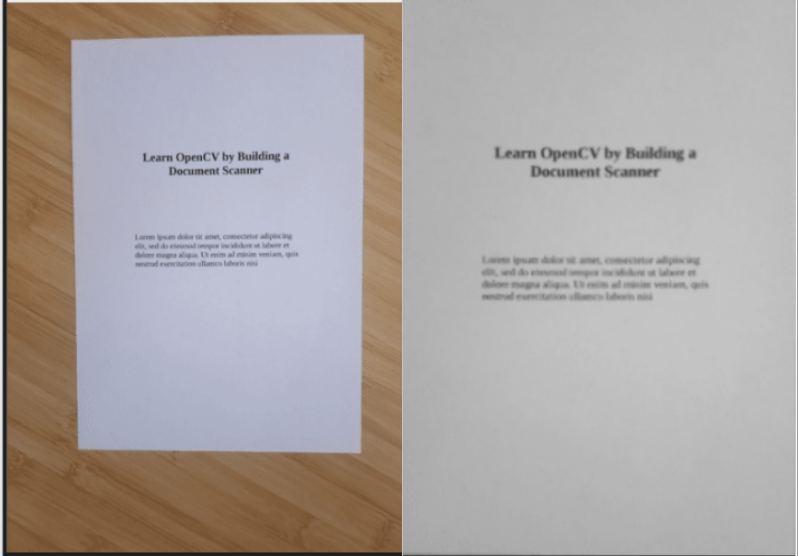
- Apply four points transformation algorithm; you can see more here. This gives us the bird look to the document like you are flying and see from the vertical perspective “birds eye view.”, which computes the perspective transform matrix by using getPerspectiveTransform function and applies it to obtain our top-down view by calling the function
cv2.warpPerspective. Here is the good result :
Now we take a look at some test cases :
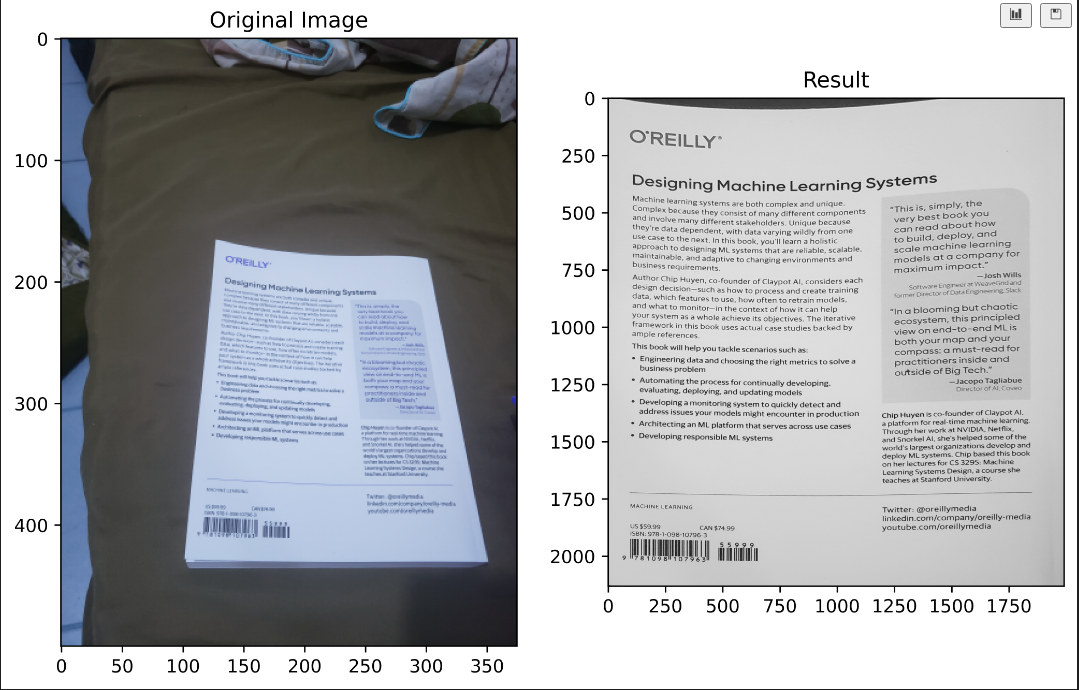
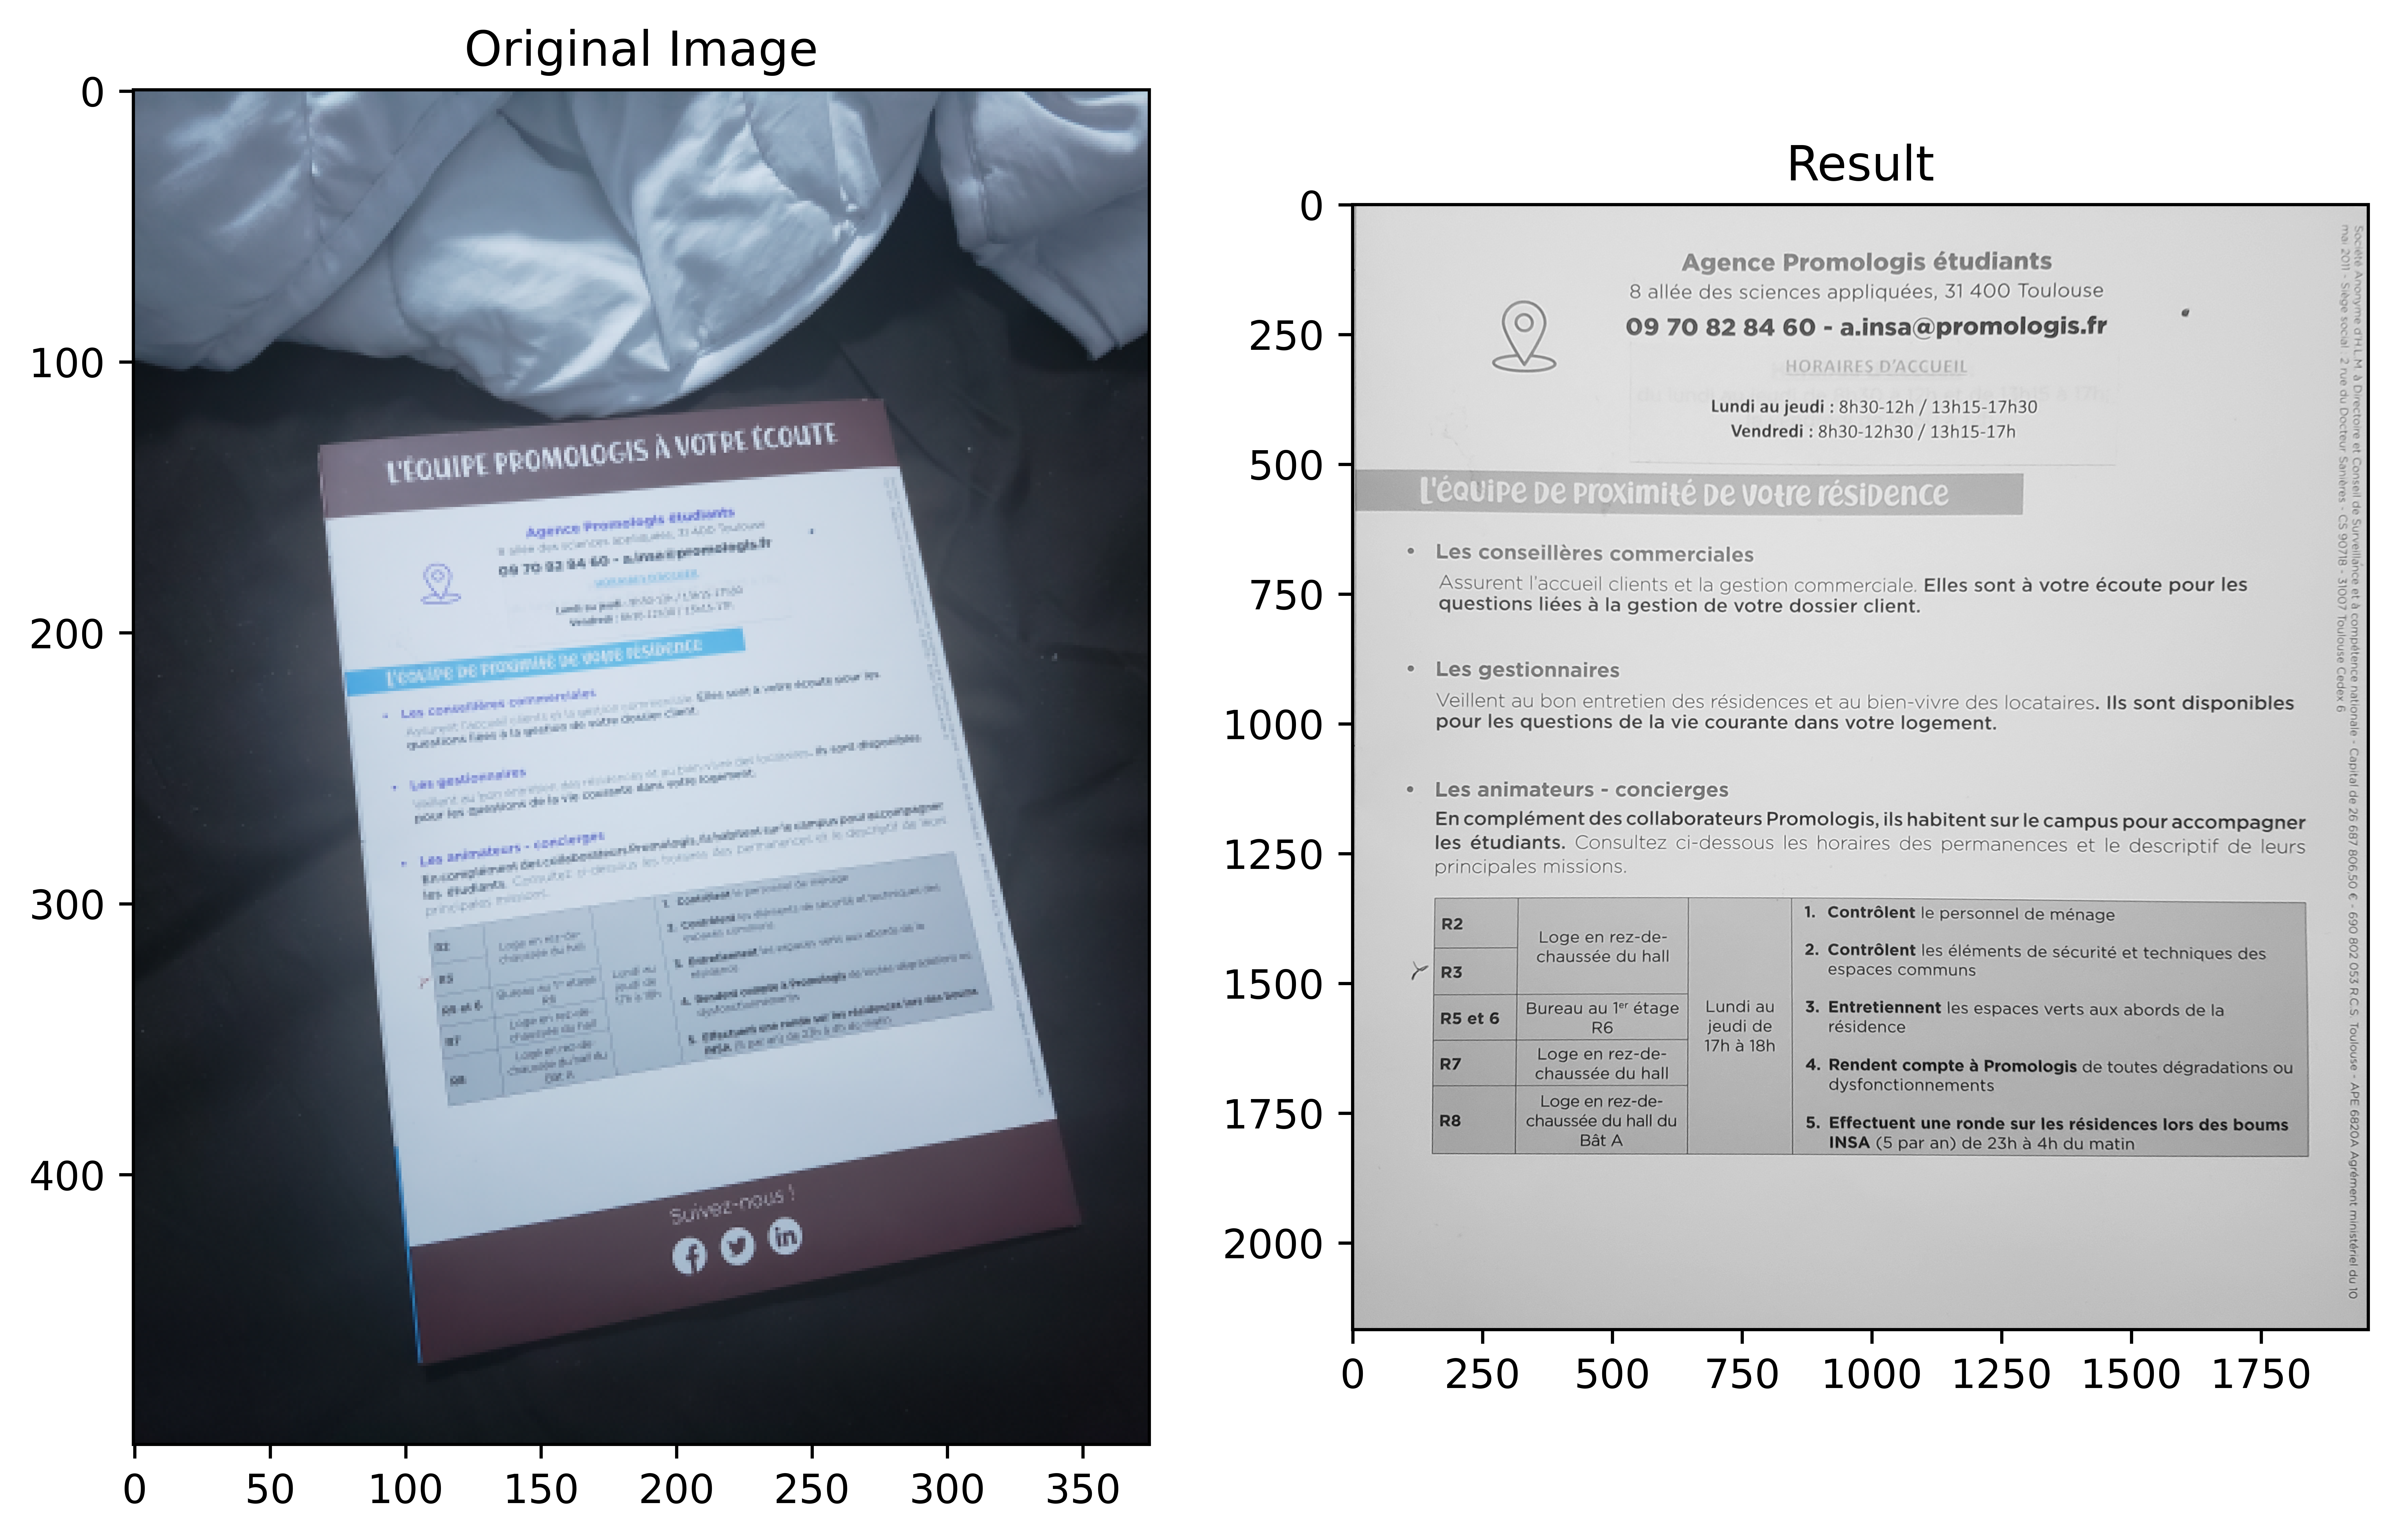
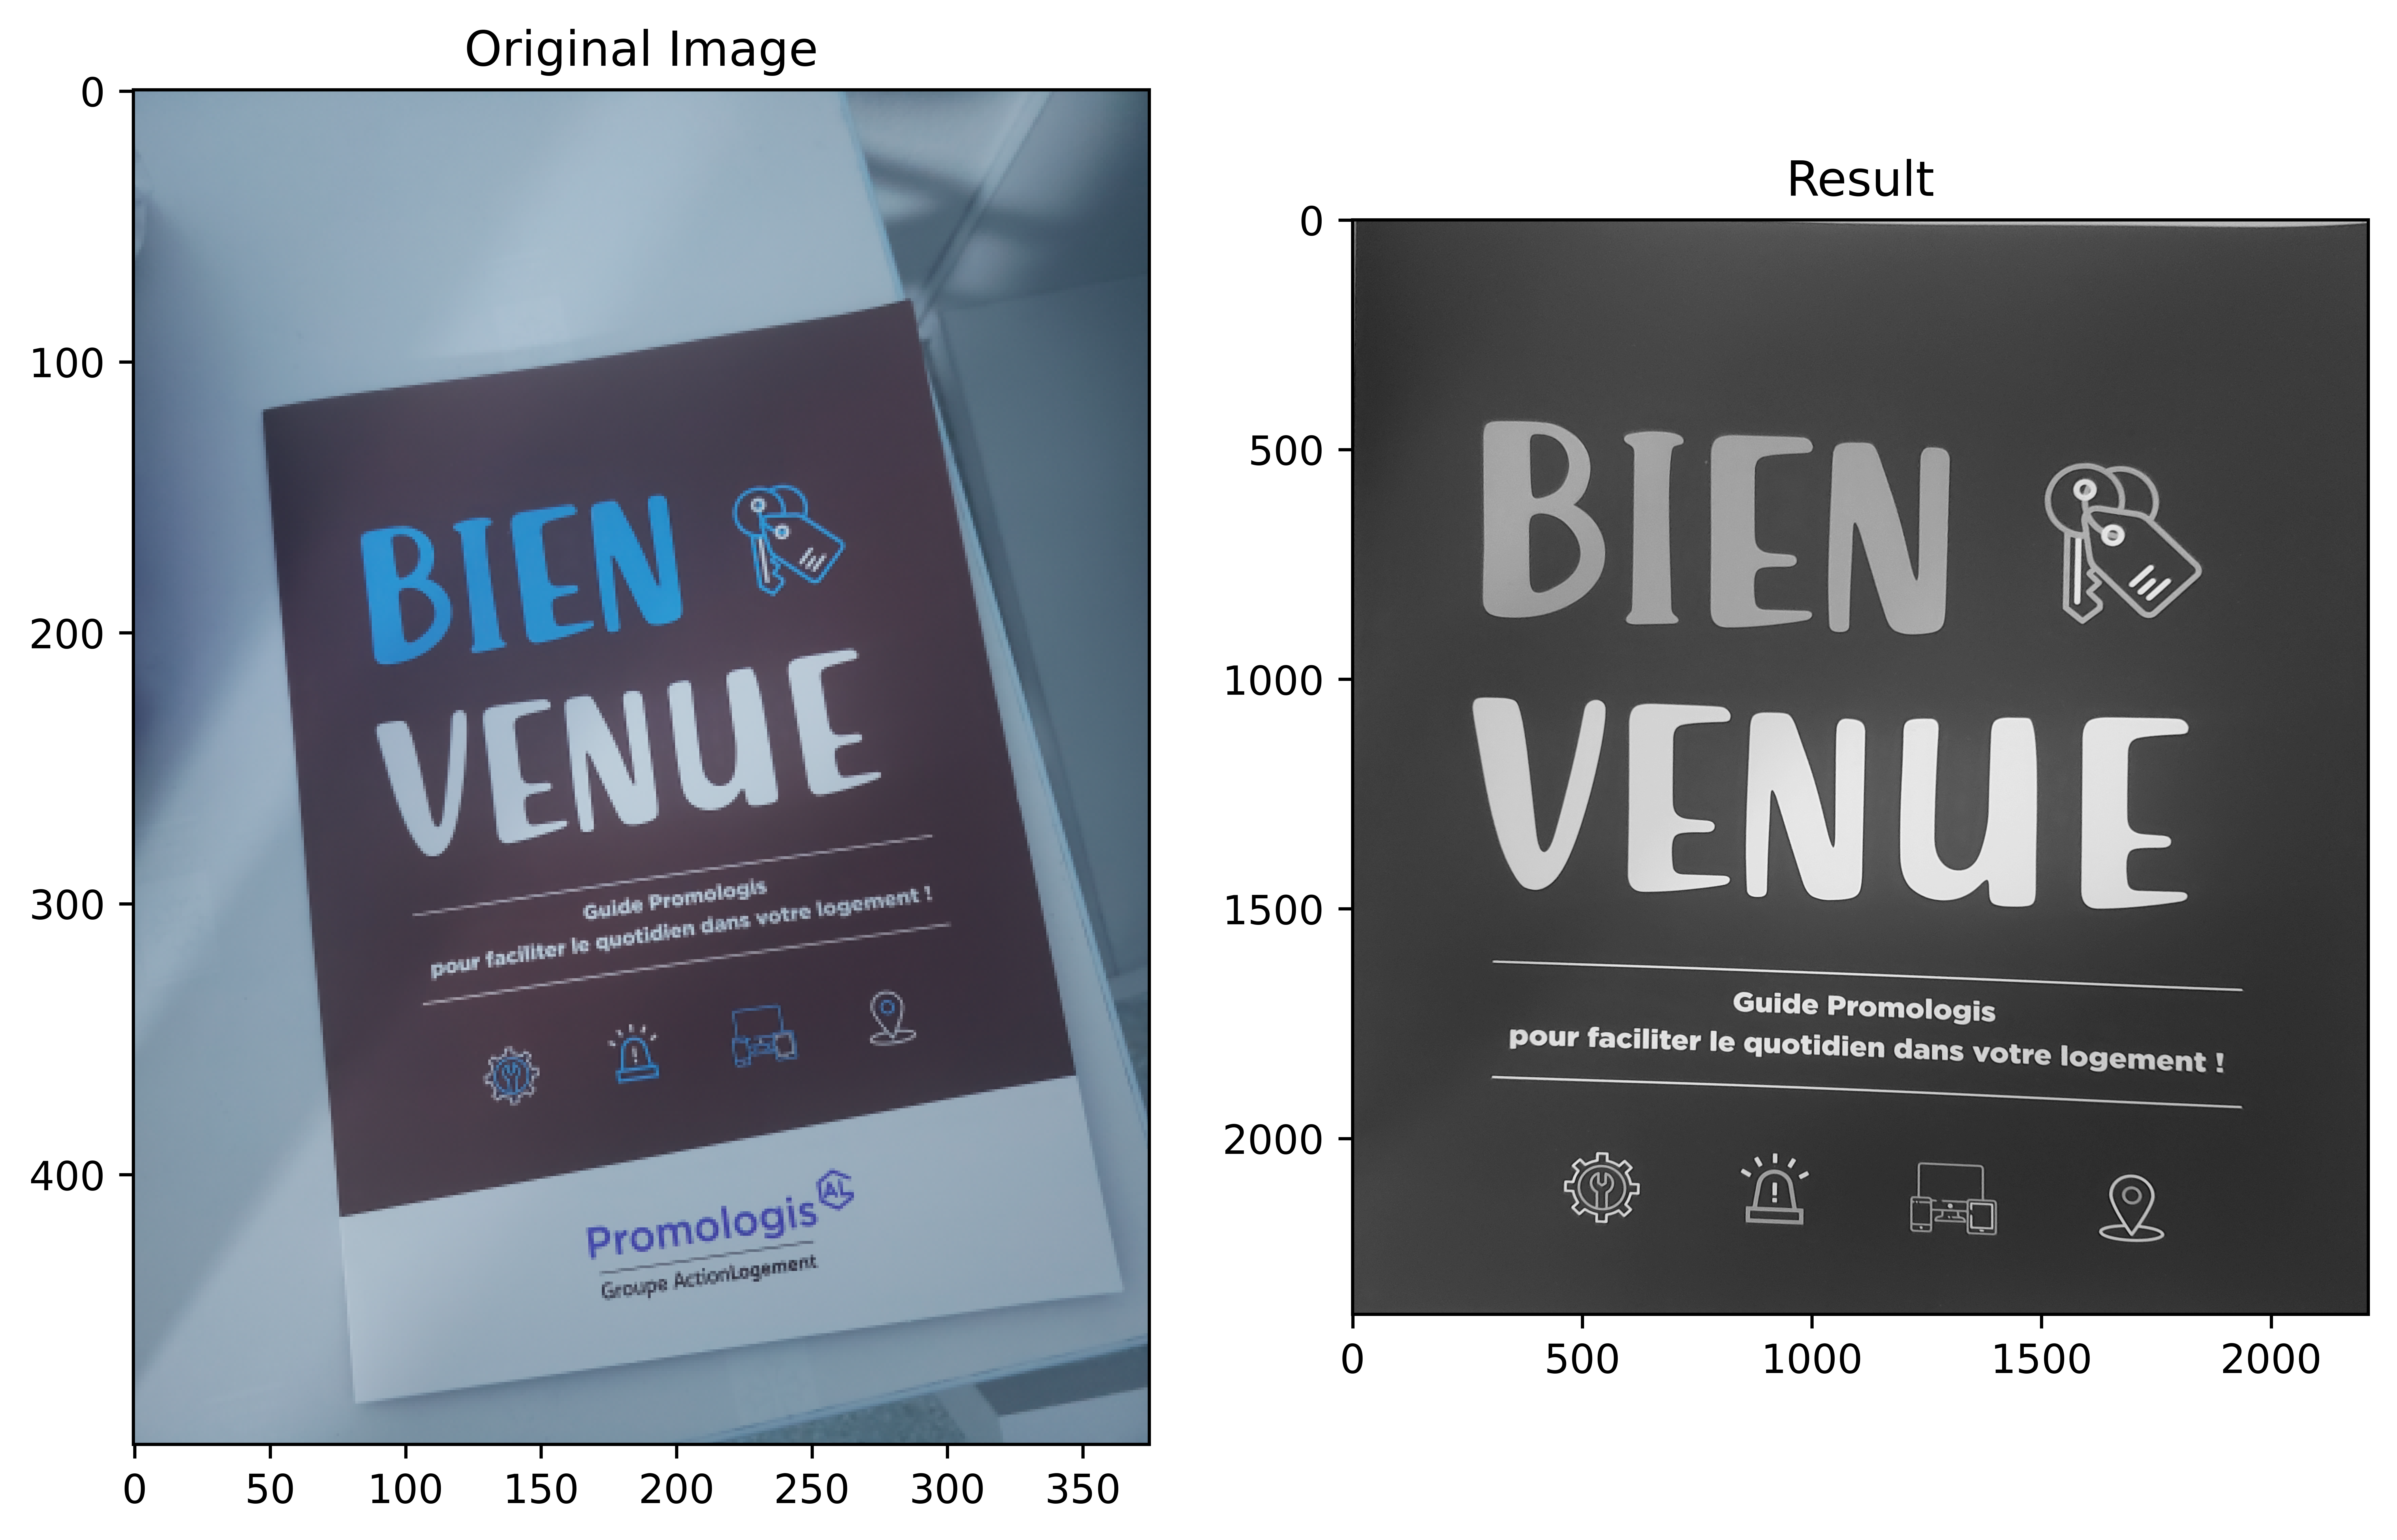
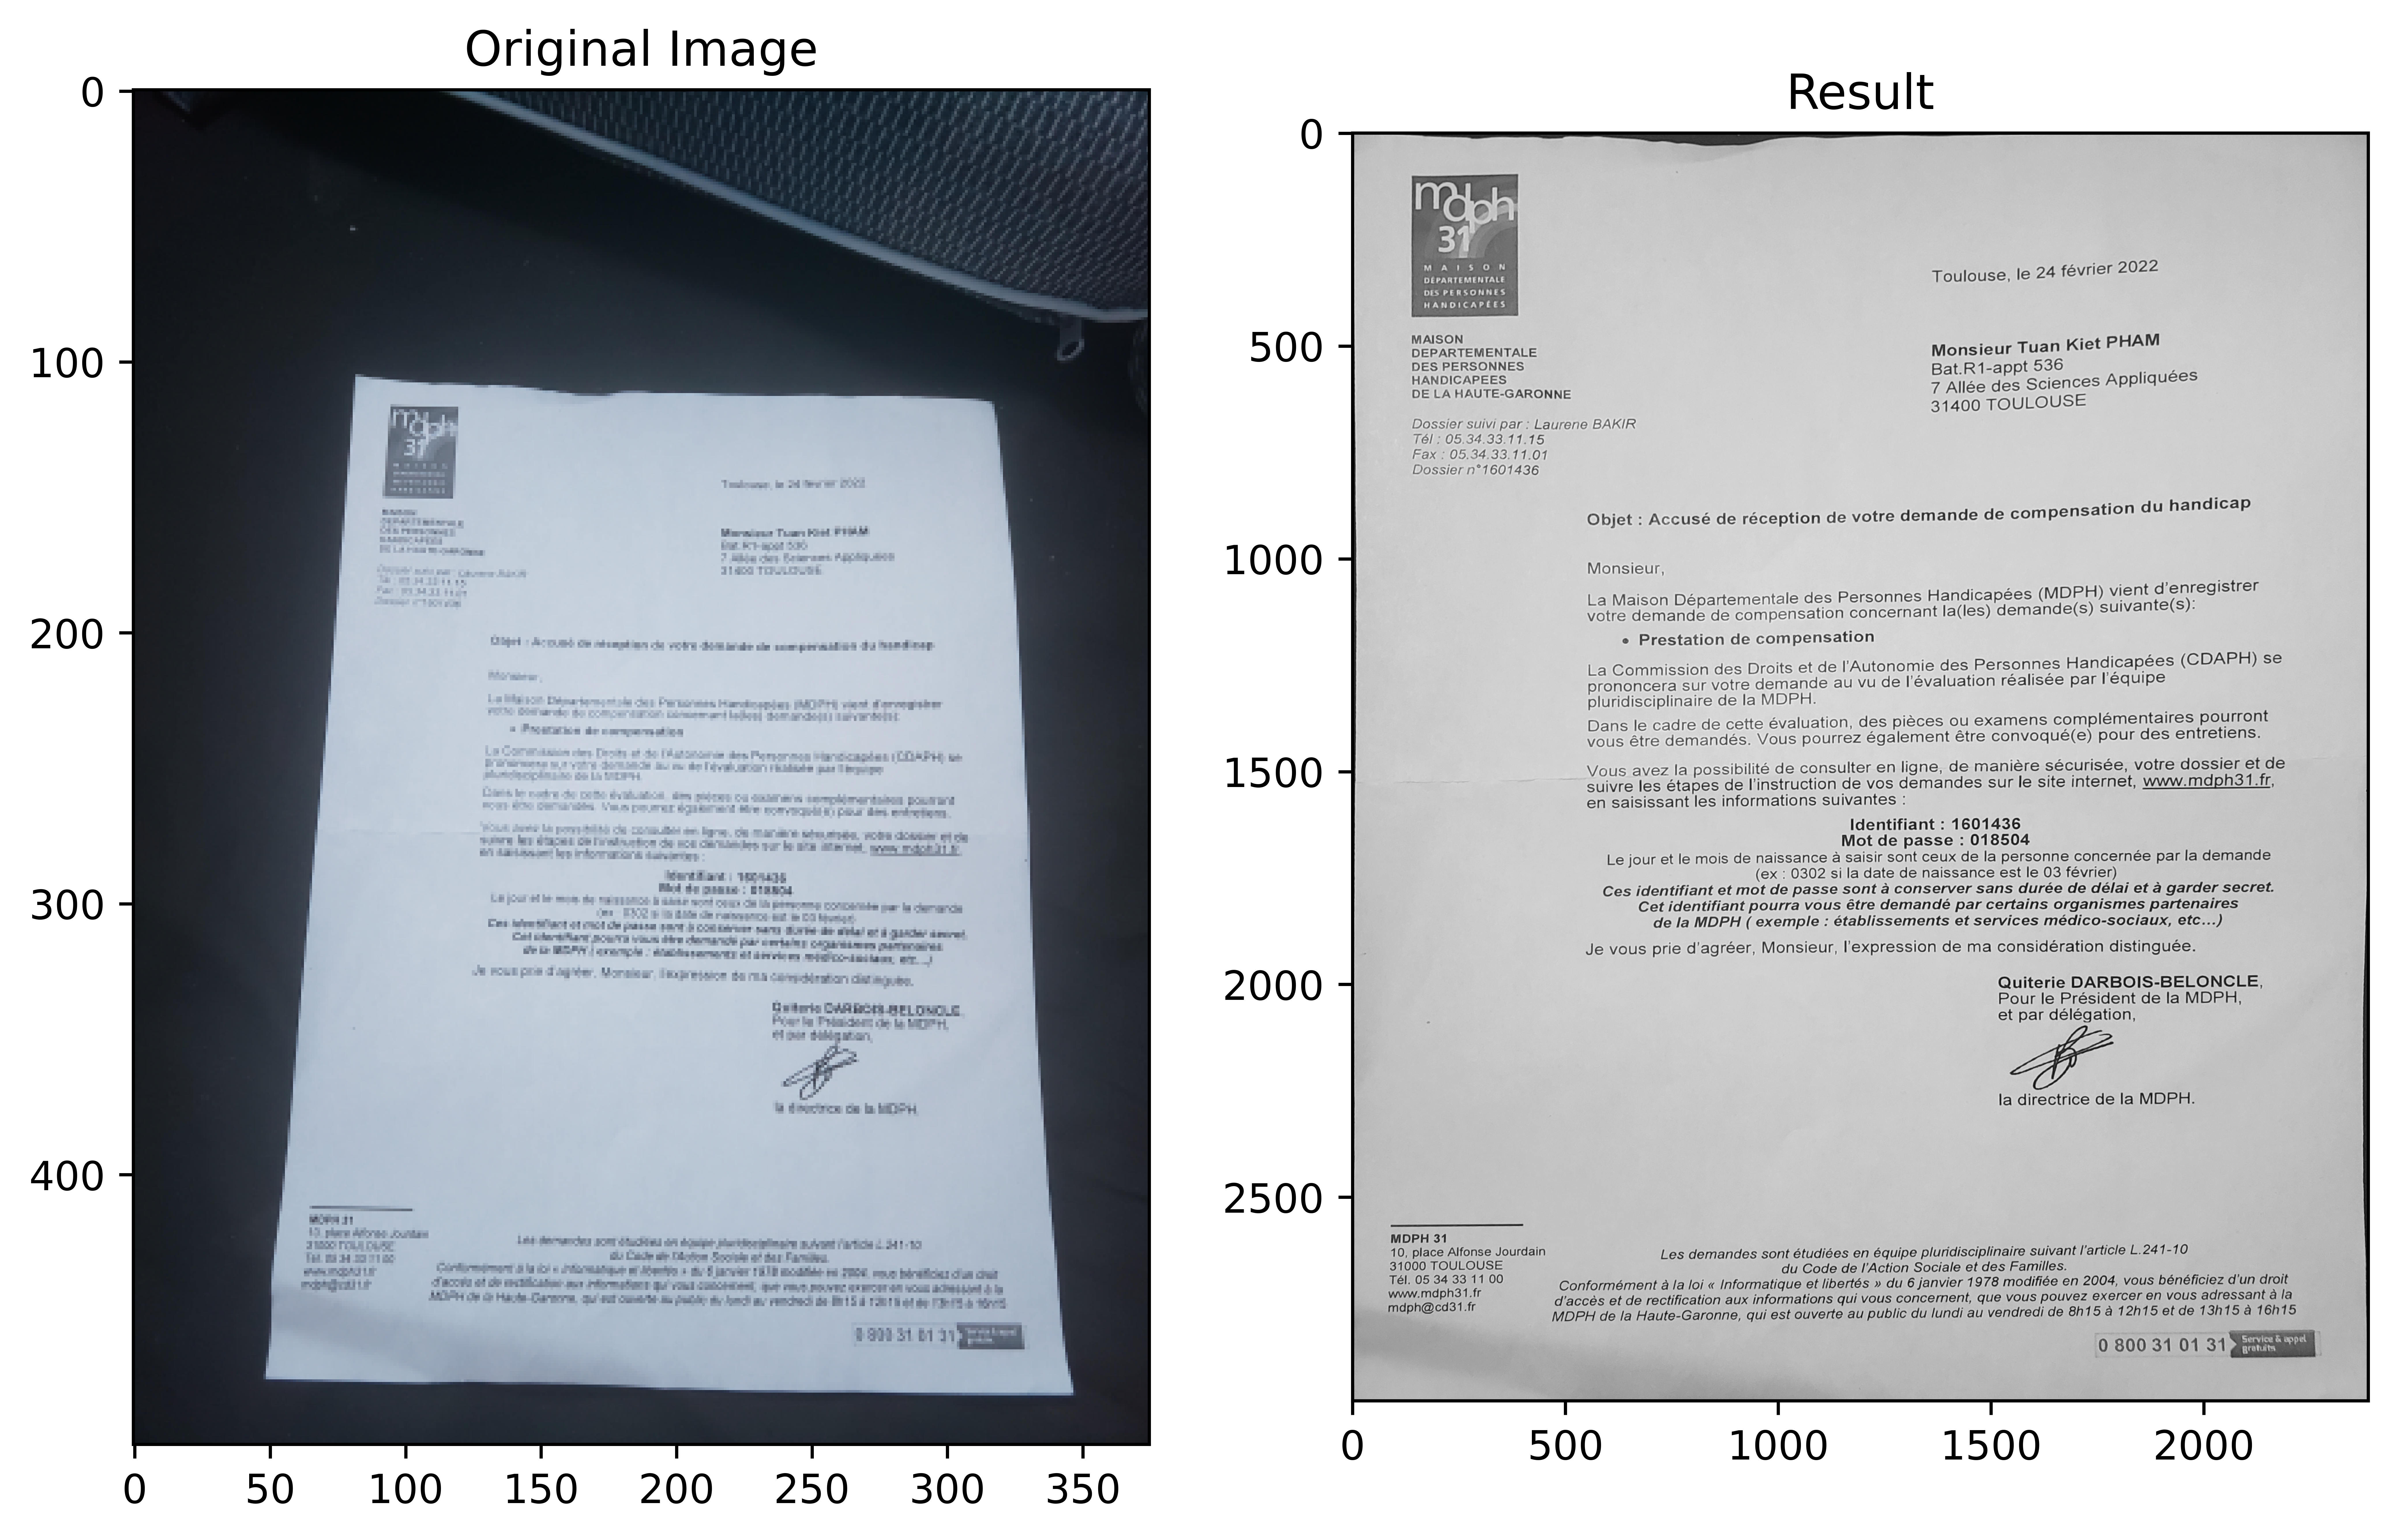
The method works quite well, but in some cases, the algorithm doesn’t act well because the contour of the piece of paper is quite blurred compared to the background color, so the user should take a photo whose edge is apparent. For example:
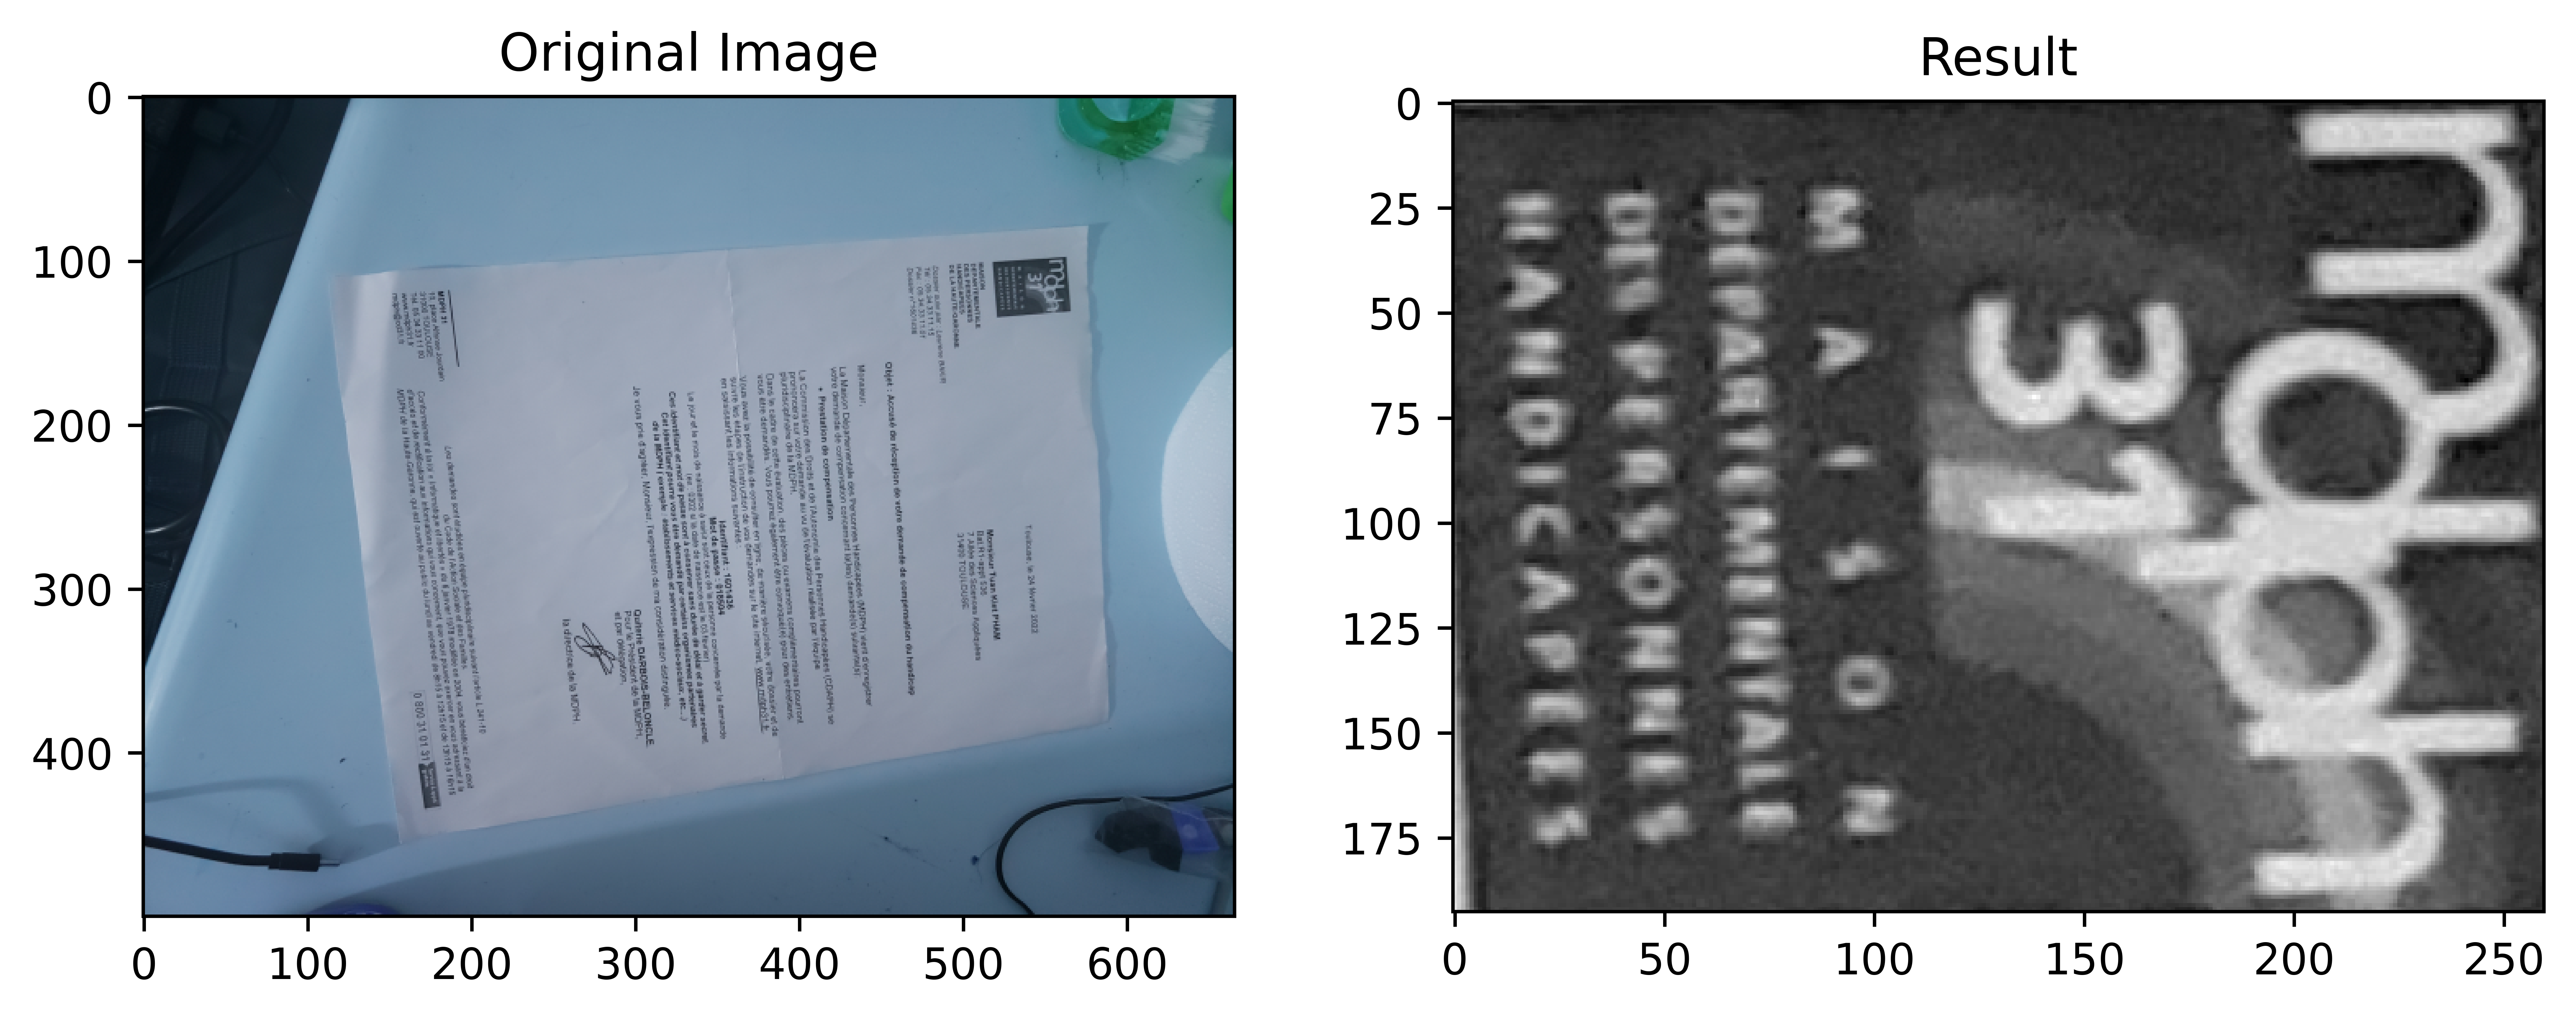
Conclusion
These main ideas basically may be implemented into the plugin into an OCR pre-processing dialog in the future.These main ideas basically may be implemented into the plugin into an OCR pre-processing dialog in the future.